Since GitHub Actions is now a thing and setting up a CI workflow is as easy as ever, why not take 10 minutes to make publishing a new article in Jekyll as easy as pushing to master?
Also this gets around the GitHub pages builder, which limits your plugin choices.
Creating a workflow
In your repo’s root folder, create the .github/workflows folder. Your GitHub Action workflows will live here.
Create a yml file inside this folder, like publish.yml. Start the file with:
name: Publish Jekyll Site
Triggers
We’re going to trigger this workflow every time we push to master. So continue publish.yml with:
on:
  push:
    branches:
      - master
Reference: Events that trigger workflows
Jobs
Let’s start to tell GitHub what to do after this workflow is triggered.
jobs:
  jekyll-build-deploy:
      runs-on: ubuntu-latest
      steps:
        - uses: actions/checkout@v2
        # More steps after this...
Here we’ve created a job named jekyll-build-deploy. runs-on: ubuntu-latest tells GitHub which environment to use. steps is where we’ll start to specify what to do in a job.
Building the site
Checkout our code
First we need to get our source code from our repo.
- uses: actions/checkout@v2
This checkouts our code from the repository into the workspace. More Info
Cache dependencies
To speed up our build, we’ll cache our bundler dependencies between runs.
- uses: actions/cache@v2
  with:
    path: vendor/bundle
    key: ${{ runner.os }}-gems-${{ hashFiles('**/Gemfile.lock') }}
    restore-keys: |
      ${{ runner.os }}-gems-
This tells CI to retrive vendor/bundle if it’s cached, and cache vendor/bundle after this run finishes. More Info
Install dependencies
First we need to setup the virtual environment for ruby:
- uses: actions/setup-ruby@v1
  with:
    ruby-version: '2.6'
Now bundle should be available, let’s install our dependencies:
- name: Install dependencies
  run: |
    bundle config path vendor/bundle
    bundle install --jobs 4 --retry 3
Here we’re giving this step a name using name: ..., and also run: | to run multiple commands.
Build webpages using jekyll
- name: Build site
  env:
    JEKYLL_ENV: production
  run: bundle exec jekyll build
Here using env we’re telling Jekyll to build for a production environment. After this step finishes, inside _site should be our built static website.
Deploying the site
Here are a few ways to deploy, depending on your hosting service.
rclone
If your hosting service support rclone full list, like AWS S3 or Aliyun OSS (what I’m using), you could use the wei/rclone@v1 action to deploy.
- Setup your rclone config locally (see above list for docs for each provider)
rclone config show <config-name>to print out your config- Go to your repository -> Settings -> Secrets, create a new secret named
RCLONE_CONF, and paste your config (from step 2) inside the value section. Here’s a nice step-by-step guide. - Update your workflow file
- name: rclone to whatever
  uses: wei/rclone@v1
  env:
    RCLONE_CONF: ${{ secrets.RCLONE_CONF }}
  with:
    args: sync _site config-name:dest
Here I’m using rclone sync to sync everything inside _site to config-name:dest.
GitHub Pages
Using peaceiris/actions-gh-pages@v3 action (More Info):
- name: Deploy to GitHub Pages
  uses: peaceiris/actions-gh-pages@v3
  with:
    github_token: ${{ secrets.GITHUB_TOKEN }}
    publish_dir: _site
Or you could deploy to another repoistory.
Or literally anything else
Want to build a docker image and push it to Docker Hub? Want to archive all versions of your site? Want to SSH to your server and restart a service? As long as your deployment can be done using a script, you can just put it in a run: | step.
Also, there is a good chance other people already tried this before you, check out GitHub Marketplace for user created actions.
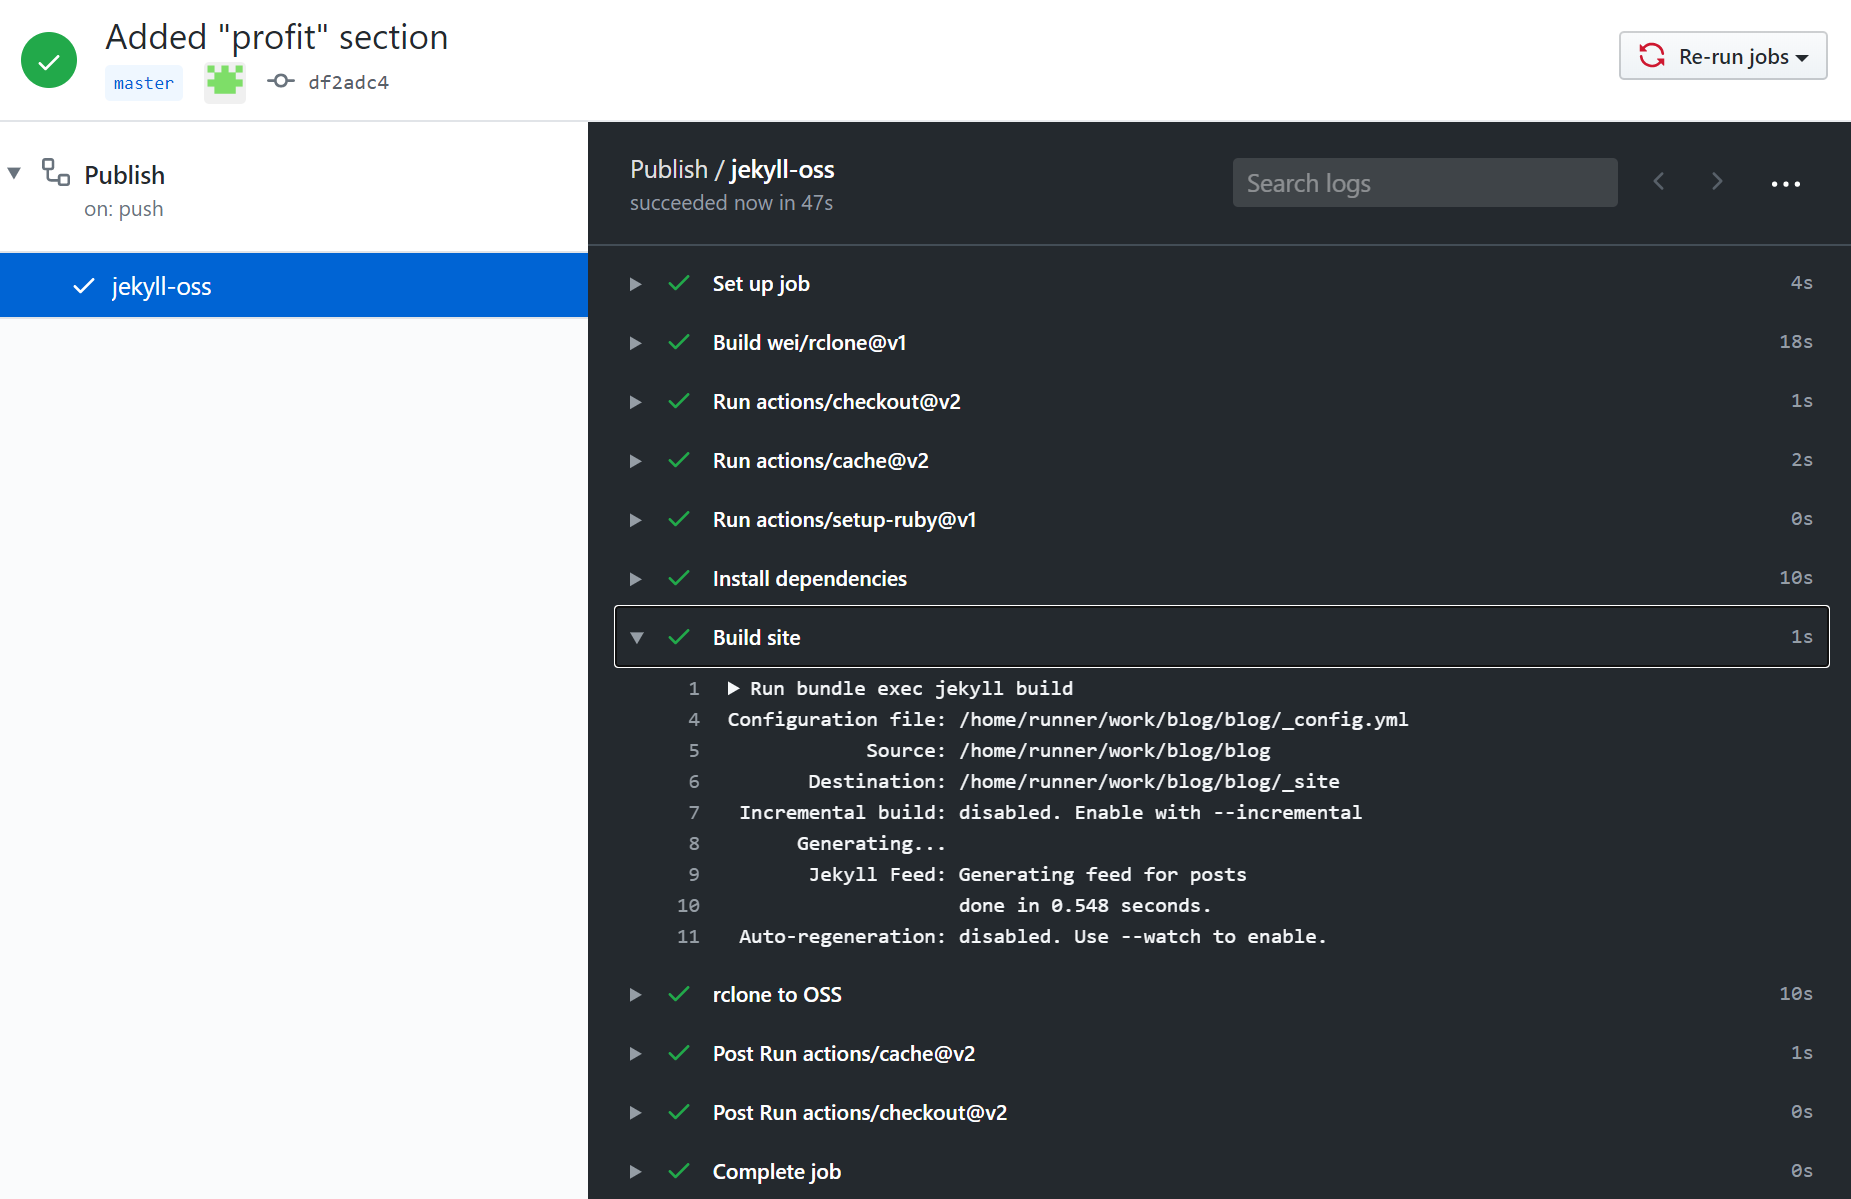
Profit
This is what the finished publish.yml should look like:
name: Build Jekyll & Publish to OSS
on:
  push:
    branches:
      - master
jobs:
  jekyll-oss:
      runs-on: ubuntu-latest
      steps:
        - uses: actions/checkout@v2

        - uses: actions/cache@v2
          with:
            path: vendor/bundle
            key: ${{ runner.os }}-gems-${{ hashFiles('**/Gemfile.lock') }}
            restore-keys: |
              ${{ runner.os }}-gems-

        - uses: actions/setup-ruby@v1
          with:
            ruby-version: '2.6'

        - name: Install dependencies
          run: |
            bundle config path vendor/bundle
            bundle install --jobs 4 --retry 3

        - name: Build site
          env:
            JEKYLL_ENV: production
          run: bundle exec jekyll build

        - name: rclone to OSS
          uses: wei/rclone@v1
          env:
            RCLONE_CONF: ${{ secrets.RCLONE_CONF }}
          with:
            args: sync _site oss:bucket
Commit this file, and now make some changes to your site, commit & push your changes to master.
In “Actions” tab in your repository you should now see your latest commit triggering a run.
Also, due to caching, the second run should be a lot faster than the first.
What else
- You can try to split the build steps and deploy steps into separate jobs, using artifacts. More Info
- You can use a self-hosted runner, if you somehow ran out the 2000 minutes quota. More Info
- You can try to create your own action (checking the site, deploying to some service, …), so the community can easily use them in their own workflows. More Info
- Replace sensitive information with secrets. More Info
- … and many more